The GAMCA/WAFID medical appointment slip is an important document for applicants travelling to GCC countries for eligible visa purposes. It contains the information needed to identify the applicant’s medical appointment and assigned medical centre.
Many applicants still search for “GAMCA slip,” “GAMCA medical appointment slip,” or “WAFID medical slip,” even though WAFID is the current name associated with the system formerly known as GAMCA.
What Is a WAFID Medical Slip?
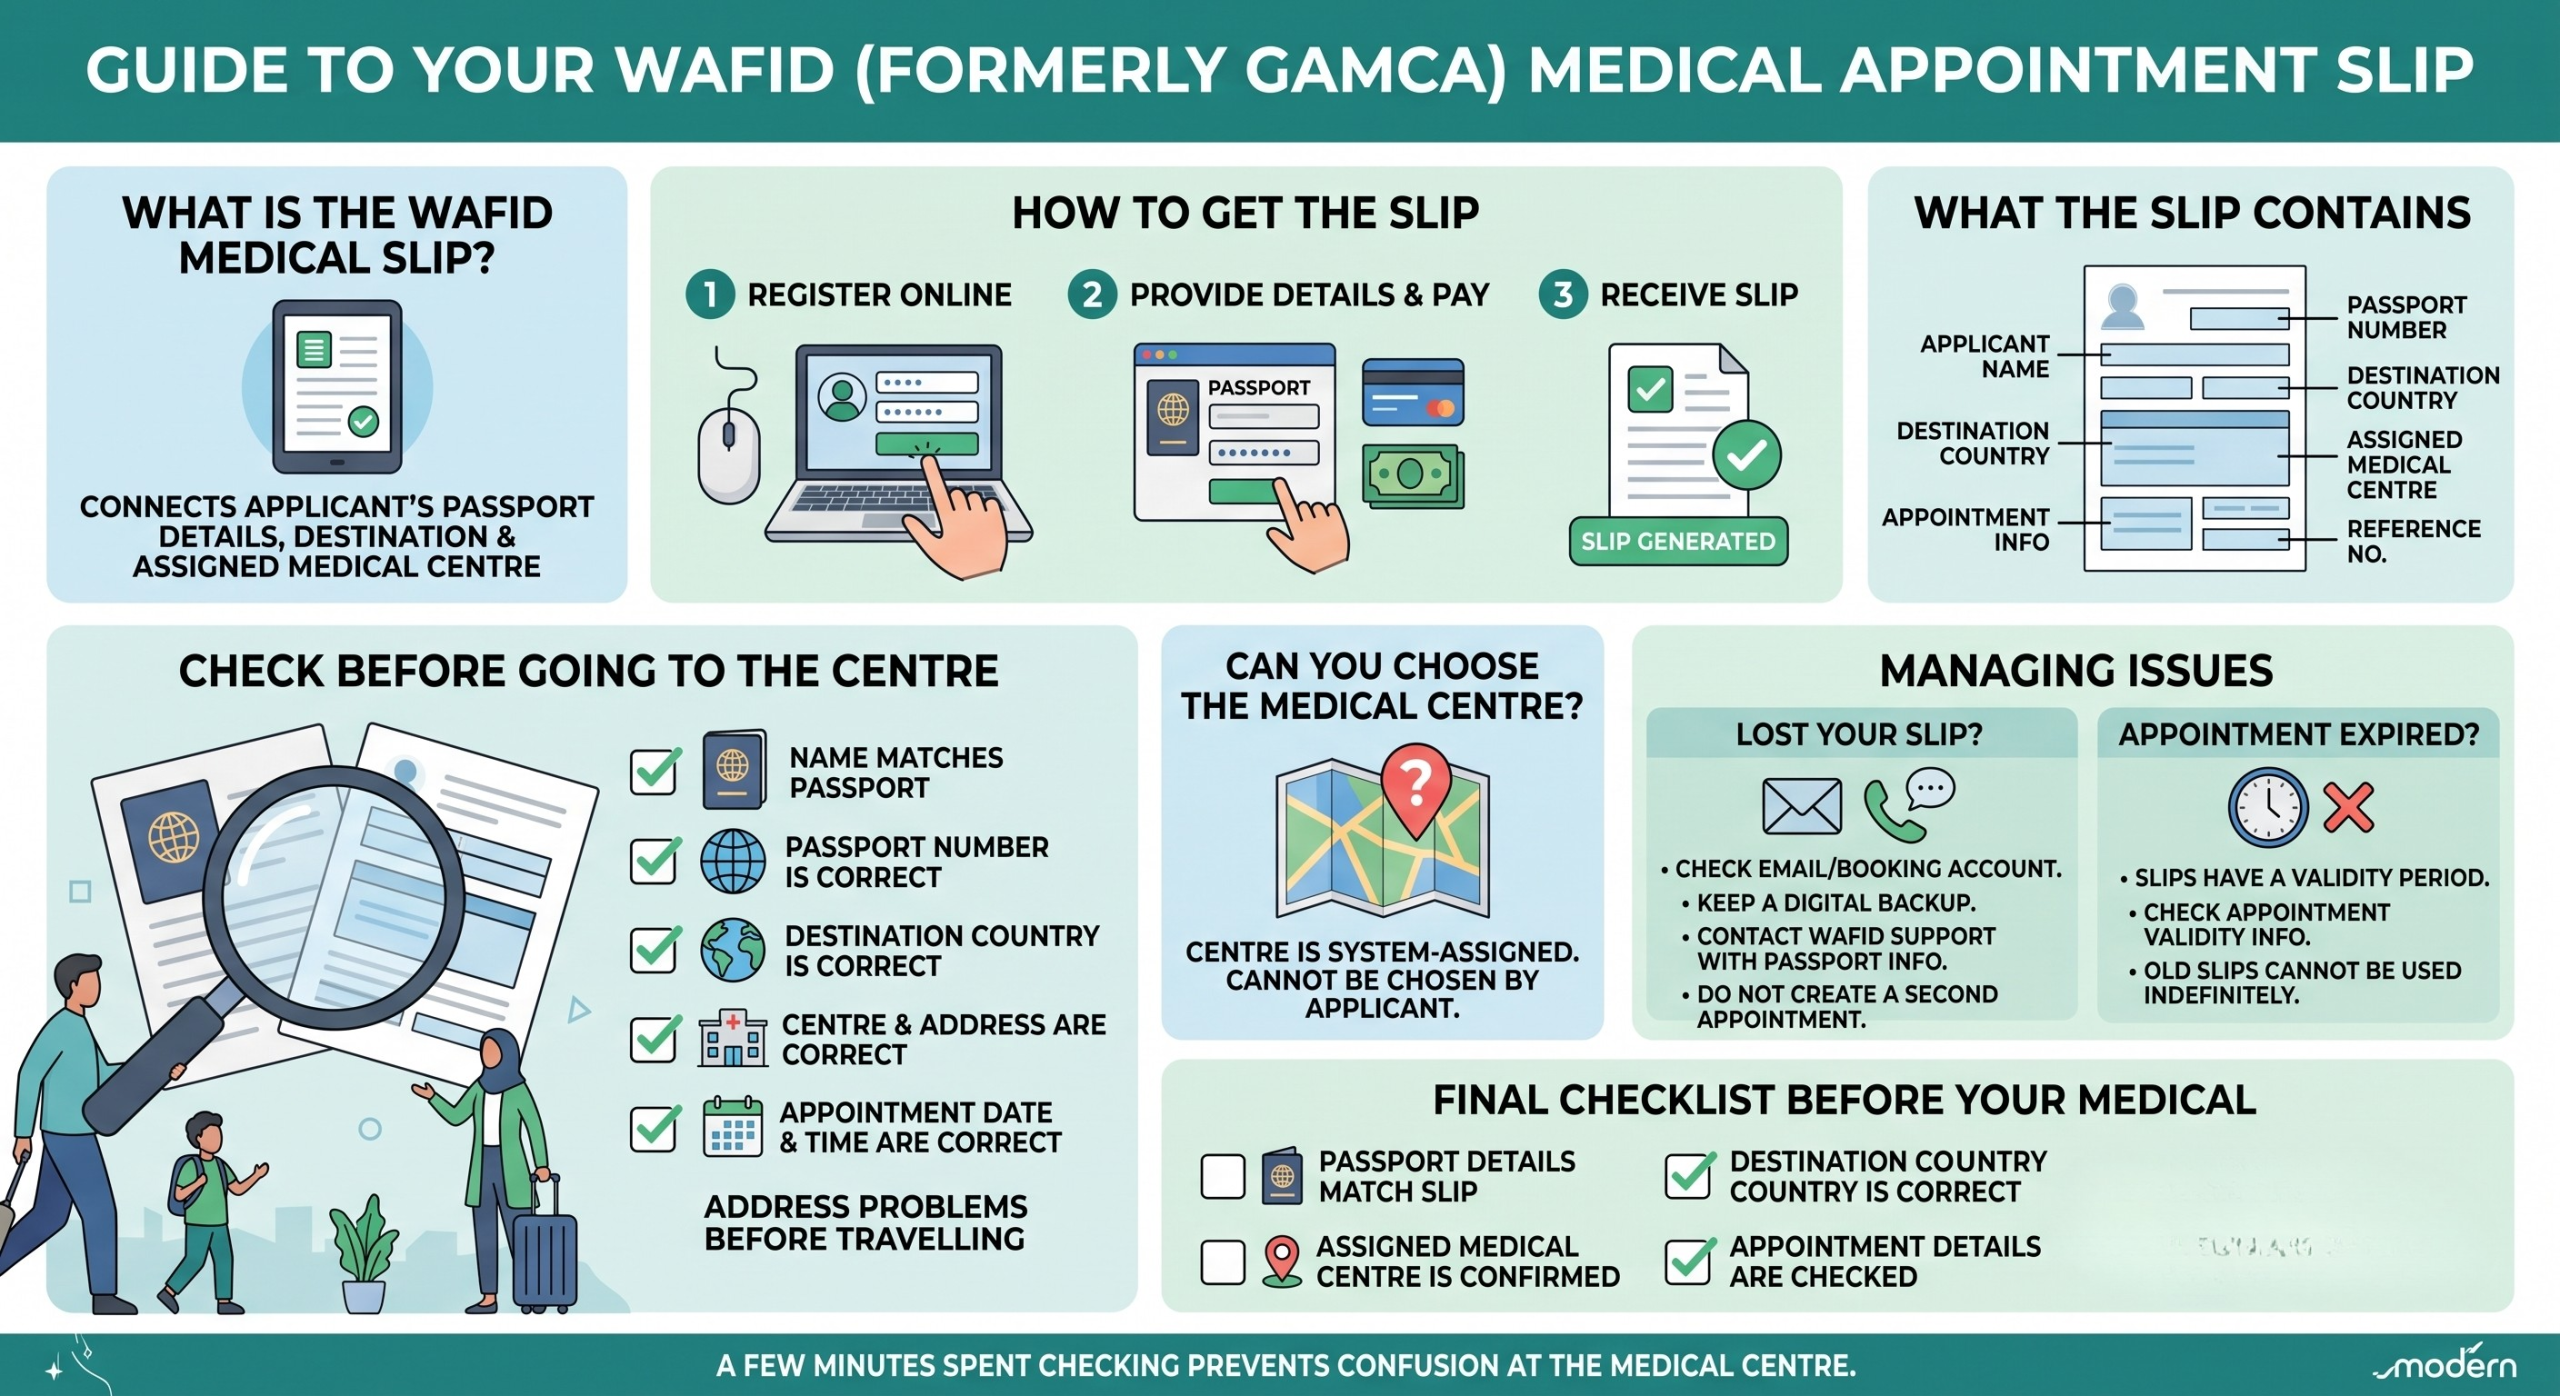
A WAFID medical slip is generated as part of the medical appointment process. It connects the applicant’s passport details, destination information and assigned medical centre.
The appointment system uses the information entered during registration to process the booking and assign an approved medical centre. Wafid explains that applicants cannot simply choose any specific centre after booking because the system handles centre allocation.
What Information Does the Slip Contain?
The exact format may vary, but an appointment slip generally contains important information such as:
- Applicant details
- Passport information
- Destination country
- Medical centre
- Appointment information
- Reference or slip details
Check all information carefully after receiving the slip.
How to Get a GAMCA WAFID Slip
The general process starts with registering for the WAFID medical appointment using the applicant’s correct passport information.
The applicant provides the required details, completes the applicable payment process and receives an appointment connected with an approved medical centre.
Once the appointment is successfully generated, the medical slip can be accessed according to the current WAFID process.
Check the Slip Before Going to the Centre
Do not wait until the day of the examination to check your appointment slip.
Verify:
Name: It should match your passport.
Passport number: Check every digit carefully.
Destination: Make sure the intended GCC country is correct.
Medical centre: Confirm the assigned centre and address.
Appointment details: Check the date and other available appointment information.
If you notice a problem, address it before travelling to the centre.
Can You Choose the Medical Centre?
Applicants should not assume that they can freely select any WAFID-approved medical centre.
The current booking process uses the system to assign a centre based on the information entered and available allocation. Wafid specifically states that applicants and booking desks cannot manually override the centre allocation.
This is important because applicants should plan their travel only after confirming the centre shown on their valid slip.
What If You Lose Your Slip?
If you lose your physical or digital copy, first check your email, messages or the booking account through which the appointment was generated.
Keep a digital backup of the appointment slip after receiving it. If you cannot access the document, contact the appropriate booking or WAFID support channel and provide your passport and appointment information.
Do not create a second appointment simply because you cannot immediately locate the original slip.
What If the Appointment Expires?
A WAFID appointment has a validity period, and applicants should complete the examination within the applicable period.
Gamca already has a dedicated article covering what happens when a GAMCA appointment expires before testing.
Therefore, applicants should check the validity information associated with their appointment rather than assuming that an old slip can be used indefinitely.
Why Is the Slip Important?
The slip connects the applicant with the appointment and medical centre in the system. Taking the correct slip to the assigned centre helps the staff identify the appointment and process the examination.
Keep the slip together with your passport and other required documents.
Final Checklist Before Your Medical
Before leaving for your appointment:
☐ Passport details match the slip
☐ Destination country is correct
☐ Assigned medical centre is confirmed
☐ Appointment details are checked
☐ Digital copy of the slip is saved
☐ Required supporting documents are ready
☐ Destination country is correct
☐ Assigned medical centre is confirmed
☐ Appointment details are checked
☐ Digital copy of the slip is saved
☐ Required supporting documents are ready
A few minutes spent checking the slip can prevent unnecessary confusion at the medical centre.